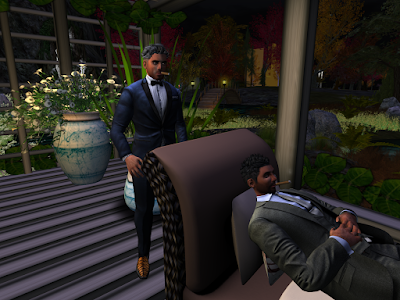
 I've been taking a LOT of photographs lately and, being the careless type I am, I haven't always remembered to adjust the available light. There are four choices: sunrise, noon, sunset, and midnight. Noon is my fallback position, but it's rather like taking a selfie under the million-watt overheads at a discount drugstore -- harsh and kind of yellowish. Sunrise and sunset both have a reddish overtone that may or may not work with the subject matter. And midnight is, well, too dark for the most part.
But I like shooting in darkness or semi-darkness; to me, it has a little bit of emotional content that adds something to the picture. Was there a way, I wondered, to create a little light within the darkness, so people could actually see what I was photographing? Quite by accident, I found a tip on the internet that seemed to apply to this and seemed like something I could actually do. So I've made my own light source.
Now, I am not one of your building types. The most sophisticated thing I've built in Second Life is a large flat prim upon which to place artwork textures. Trust me when I say, you can do this. Access the Build menu and use the tool to rez a shape on the ground. (I made a ball shape; suit yourself.) Set that shape to full brightness. Then take it into your inventory and rename it from "Object" to "Light source". That's it. If you don't have land, you can do this easily at a sandbox.
You can see from the pictures that it's easy enough to rez "Light source" and move it to wherever you need it to be, then manipulate your viewpoint to have it outside the photograph but still casting light. And since you made it yourself, you can make it full perm and rez as many as you need; go ahead, turn midnight into your discount drugstore, if you want. I haven't experimented with making the light something less than full brightness, but that's easily done too.
Hope this works for you if you like taking pictures in the dark!
(And for an even more helpful hint about lighting from someone who actually knows what he's doing ;-) see the comment below from my friend Galileo Michalski!)


Try this...
ReplyDeleteOnce you've created your object, in the EDIT window for it, go to the "Features" tab.
On the bottom, put a check mark in the Light checkbox, then you can set the intensity of the light, along with the color of the light by clicking the color box right next to it.
If you want to get fancy, if you have advanced lighting on, along with lights and shadows, you can add an image to the second box, and project an image onto something.
Gali, thanks so much!! Can't wait to try this!!
ReplyDelete